Raspberry Pi OS Lite 64-bit operating system installation tutorial

This tutorial will help you install the Raspberry Pi 4 64-bit Lite operating system. I chose the Lite version over the regular desktop version because it uses less resources than the desktop version. If you are going to use the Pi as a traditional desktop computer, then definitely install the desktop version. But for the purposes of this tutorial, I’m doing the lite installation.

Here is what you will need to get started. Some of these links are affiliate links that support my website and content creation at no additional cost to you.

Raspberry Pi 4 Kit: (Amazon) 2GB | 4GB | 8GB
(The kit comes with the Raspberry Pi 4 board, case, fan, 32GB microSD card, USB microSD card reader, micro HDMI to HDMI cable and power supply.)

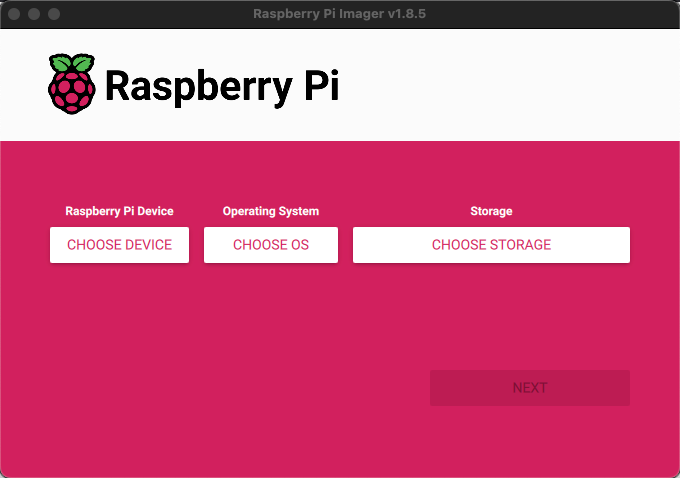
The first thing we need to do is download the Raspberry Pi Imager. It is available for Windows, Mac and Ubuntu (Linux).

Once you have it installed, open it up and it will ask you what Raspberry Pi you have, the operating system you want to install and where to install it.

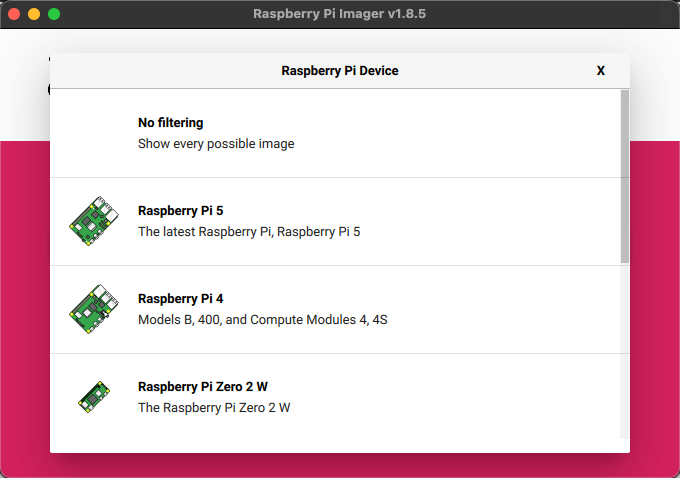
Click on Choose Device and select the Raspberry Pi you have. For me, I am using the Raspberry Pi 4.

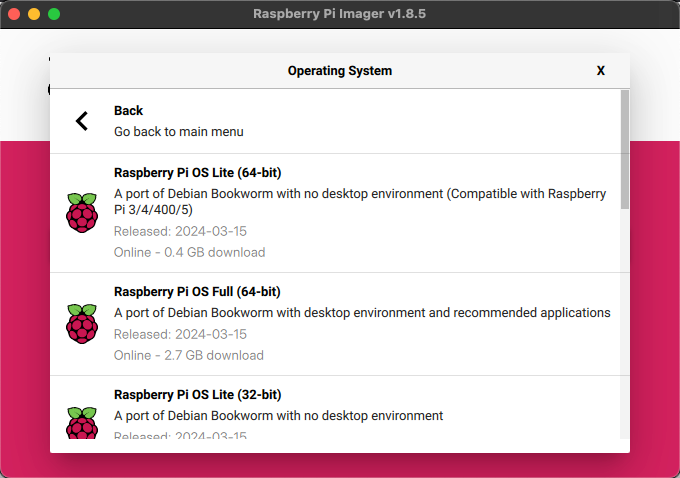
Next click on Choose OS and select Raspberry Pi OS (other) and then choose Raspberry Pi OS Lite (64-bit).

Finally, click on Choose Storage and pick your SD card reader. Make sure you have your microSD card inserted into the card reader before you do this or it won’t show up.

Once you have all three entries populated, click the Next button. It will ask you if you would like to apply OS customization settings.

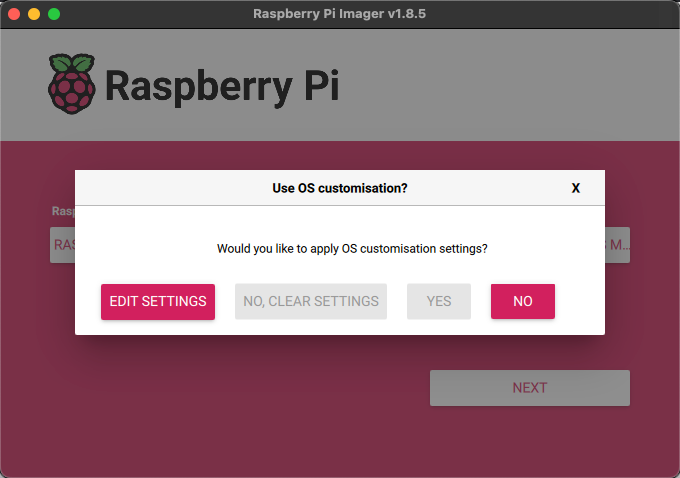
Click Edit Settings.

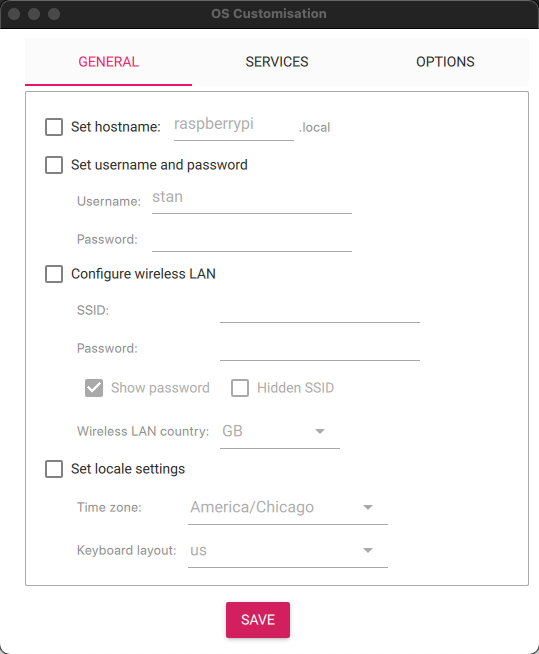
Here you can set the name of your Pi, your username and password, your time zone and configure your WiFi connection.

Hostname
I would set this to something easy to remember because it will help you connect remotely to it later on. It defaults to raspberrypi.

Username and Password
I would recommend using pi for your username unless you have a specific reason to change it. A lot of tutorials including mine assume you are using the default pi username.

Configure wireless LAN
Enter your SSID, password and change the Wireless LAN country to whichever country you are in. It defaults to GB so if you’re are in the US you will need to change it to the US.

Set locale settings
This is for setting up your time zone and keyboard layout. I’m in the central time zone so I am using America/Chicago.

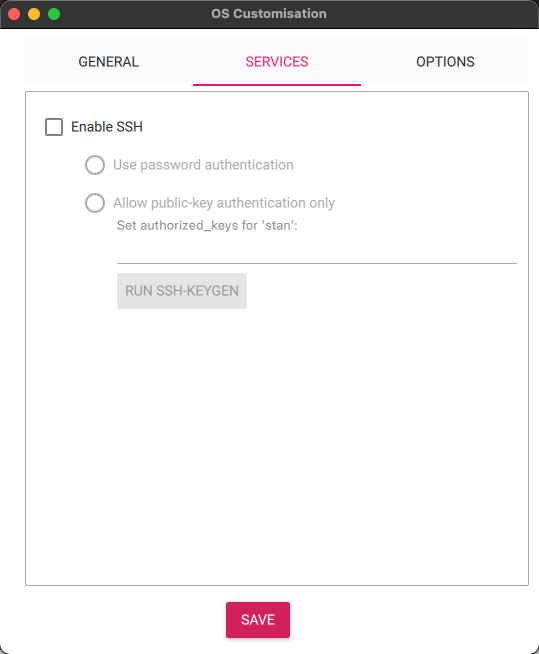
If you’re going to be remoting in via SSH like I do, click the Services section and check the Enable SSH box and Use password authentication.

Click the Save button at the bottom which will take you back to the OS customization screen.

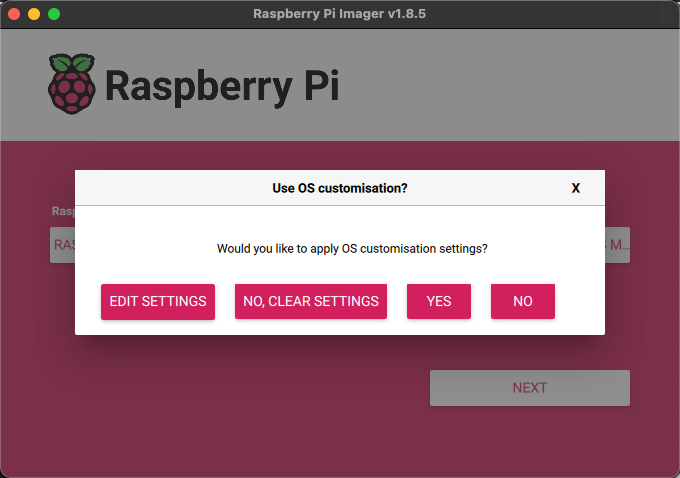
Click on Yes to apply the settings.

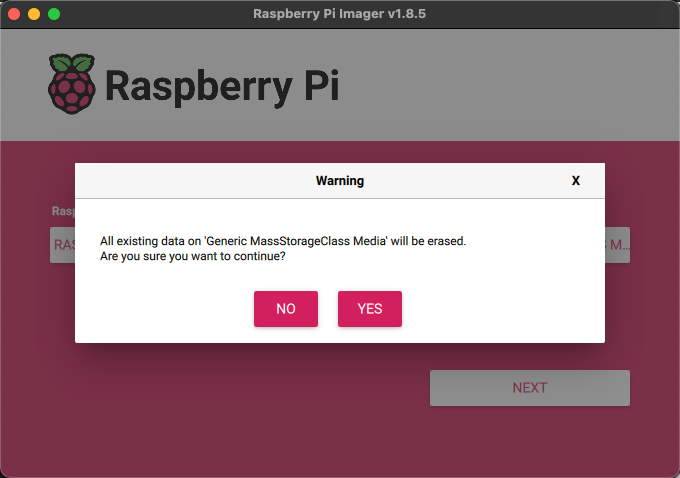
You will get a pop-up warning box that informs you that all data on the microSD card that you chose will be erased. Click Yes to continue.

Now you will see a screen that shows the writing progress to the microSD card. This will take a few minutes and then you should see a screen that looks like the one below.

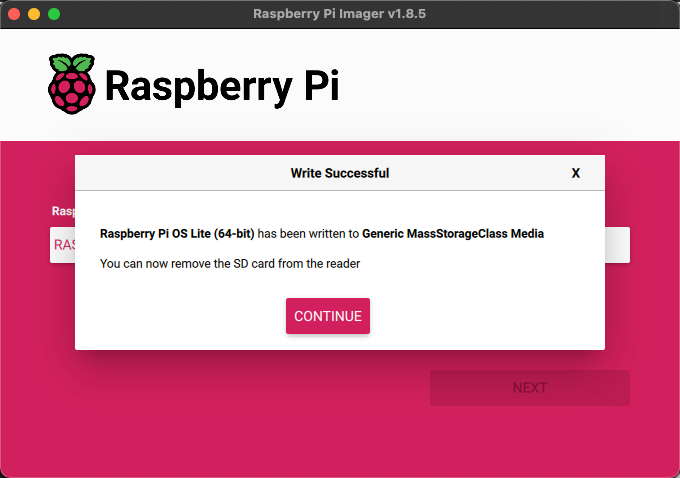
You can now click Continue and remove the microSD card from the card reader. Insert the microSD card into your Raspberry Pi and plug in the power. If you’re not going to remote into it, then plug it into a keyboard and mouse to monitor the boot up process. Otherwise, we will connect to it via SSH. The first time you boot after writing the image, it will take a few minutes to get going.

If you’re on a Mac and want to connect to the Pi via SSH, you can use the built-in Terminal program.

If you’re on Windows, I recommend downloading the free SSH client Putty.

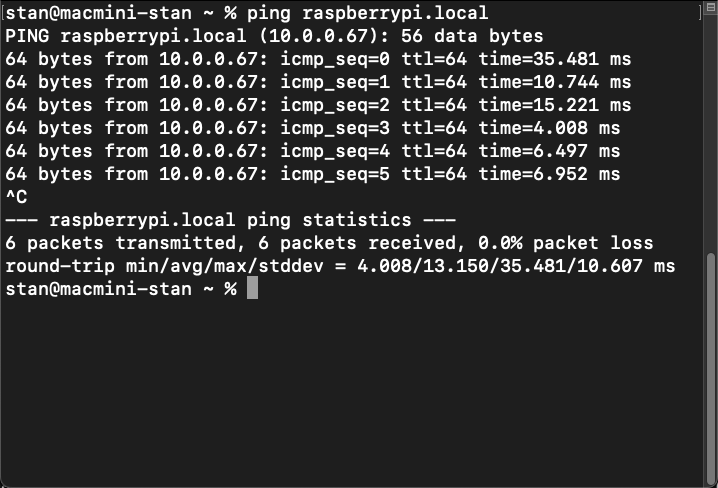
First we will ping the Pi to see if it is on the network. I will use the default raspberrypi.local address for this. If you changed the hostname, then change raspberrypi to whatever hostname you entered. You can run this same command from the terminal on a Mac or the command prompt on Windows.

If the Pi is booted up and connected to your WiFi, you should see something similar to what the below image shows. If you see request timed out, then it’s either still booting up or something didn’t connect right. Try working through the steps above and double check the SSID and password to make sure there isn’t a typo somewhere.

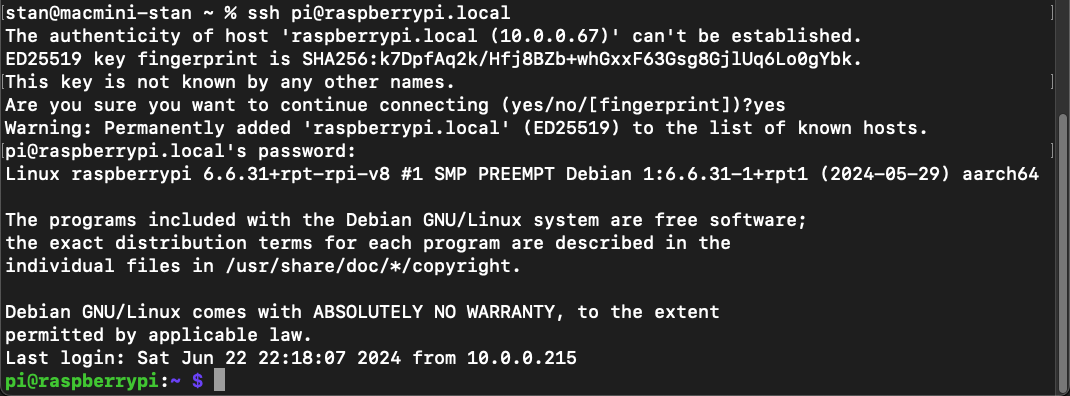
To connect via SSH to your Pi from the Mac Terminal, try the command below.

It should ask you about the authenticity of the host where you can just type in yes and hit enter. Then it will ask you for your password. If you did not set a password in the earlier steps, the default password is raspberry. When you type in the password, you won’t see anything on the screen which is normal. Just hit enter when you are done typing the password and it should log you in.

To connect via SSH to your Pi from a Windows computer, try the following settings using Putty and click Open.

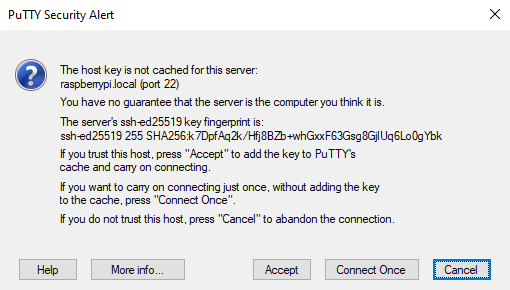
If it comes back saying it can’t find that address, you may have to connect using the IP address instead of the hostname. Check your router to see if it shows you the IP address of your Raspberry Pi. If it does find your Pi, you should see a security alert asking if you want to accept the key.

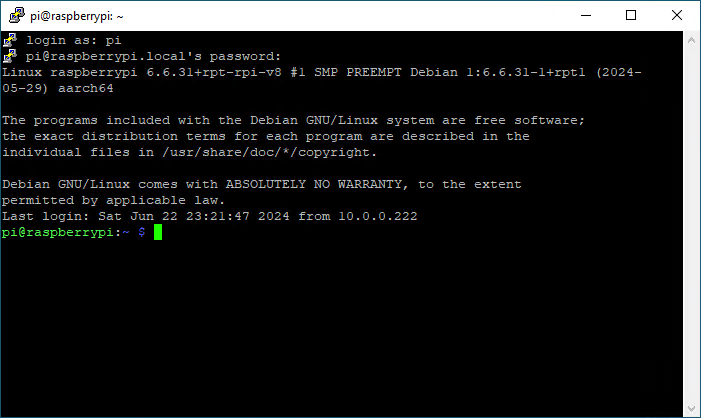
Click Accept and then login with the credentials you configured earlier. If successful, you should see the command prompt as shown below.

Now that you are logged in, I would recommend updating your Pi with the latest software. When you run the sudo command, it will ask you for your password again because it is running that command as the root or admin user.

If you have any updates it will ask you to continue so just hit enter which defaults to yes. This will download and install any updates that are out there for your system. I recommend rebooting your Pi when it has finished.

If you want to turn off your Pi, run the command below. Please do not unplug the power cord or you will probably corrupt your SD card!

If you’ve made it this far, then you’ve successfully installed the Raspberry Pi Lite 64-bit operating system! Now what do you do with it? Here are a few of my other Raspberry Pi tutorials that you can check out.

Please let me know if you have any questions about this or other Raspberry Pi related things. Thanks!

Video

I also have a video tutorial available showing how to install the Raspberry Pi OS Lite software.

Memorial day POTA activation at Clinton Lake (US-4093)

S9 pulsing noise from a nearby electric box.

On Memorial Day (May 27, 2024), my wife and I visited Clinton Lake State Recreation Area (US-4093) for the afternoon. The lake and parking lots were packed with boaters and campers. We tried to find a spot with a view of the lake, but ended up settling on the exact spot we went to last September. The weather was 75 degrees with a nice breeze to keep most of the bugs away. Despite being close to the two emerging broods of cicadas, we didn’t see any on our visit.

I setup my Icom 705 and the OM0ET MC-20 magnetic loop which is my go-to setup. While I do pack a 12v external LiFePO4 battery, I decided to just use the Icom 705 battery pack and run 5 watts. Instead of dealing with the previous problems with the iPad and connecting it to the 705, I brought a laptop with me. This is an old Asus EEE PC I bought in 2009! I recently revived it and I’m still astonished the battery holds a decent charge. It’s slow and only has 2 GB of RAM, but I was able to install a 32-bit version of Linux (Lubuntu 18.04) on it. It runs WSJT-X v2.40 and interfaces via USB cable with the Icom 705. The 10” screen is just big enough for WSJT-X though some of the settings are not visible in the menu.

Despite having a laptop, I still had some issues. One was it did not connect to my phone because I’m guessing the wireless card doesn’t like my iPhone for some reason. Even with the maximize compatibility option enabled, it would not connect. The second issue was the same as the last visit to this park and that was a pulsing noise coming from an electrical box down the way from where we were setup. Rotating the mag loop didn’t remove the noise.

At first I thought the noise was preventing me from decoding any FT8, but I quickly realized that the time on the computer was off 3-4 seconds. Without the internet, I didn’t have an automated way to update the time. While the 705 has a GPS built-in, I didn’t have it configured yet on the computer. So I just pulled up the time on my phone and set it manually. As soon as I did that, the decoding started working. Whew!

I hopped on the POTA website and spotted myself on 20m FT8. I started calling CQ and not too much later I received some replies. I checked PSK Reporter and my signal was being heard around the US. I tried switching to 15m but never made any contacts so I went back to 20m and made a few more before shutting down. I finished with 17 contacts in about an hour and a half. Not bad for 5 watts and a mag loop antenna!

It was nice not having any connection issues with the laptop and 705 using the USB cable. It was also nice to be able to call CQ POTA which I think helped people find me. I enjoyed putting the old laptop back into service. It still had around 50% battery left after an hour and a half which is amazing for the age of the battery. I think once I get the GPS from the 705 interfaced with the laptop that will eliminate the need to set the time manually. I may also try tethering my phone to the laptop via USB and see if I can get internet that way. It’s not completely needed but would be nice to have.

Log

DateTime (UTC)CallsignBandModeNotes
5/27/202420:53KA3E20MFT8
5/27/202420:56KB3IAI20MFT8
5/27/202421:00K7ZYV20MFT8
5/27/202421:08AG5PC20MFT8
5/27/202421:18N3ADO20MFT8
5/27/202421:21KI4MNR20MFT8
5/27/202421:28K2WLD20MFT8
5/27/202421:33NY4FD20MFT8
5/27/202421:39K4RNY20MFT8
5/27/202421:41KG2CV20MFT8
5/27/202421:45VE3UZX20MFT8
5/27/202421:47KF0PXO20MFT8
5/27/202422:08KC3ASJ20MFT8
5/27/202422:21WA2WL20MFT8
5/27/202422:25KD2MDS20MFT8
5/27/202422:27W2JC20MFT8
5/27/202422:29KC2HFQ20MFT8

Gear

Here is the list of gear I used for this outing. Some of these links are affiliate links that support my website and content creation at no additional cost to you.

  • Icom IC-705 QRP HF/VHF/UHF portable radio: DXE | GigaParts | HRO | MTC | R&L
  • OM0ET MC-20 Magnetic Loop Antenna: OM0ET Website
  • Insignia 6-ft light stand (NS-DLS75SBK): Amazon
  • JJC Deluxe Lens Case Pouch for Icom 705 (XXL size): Amazon
  • SHANGRI-LA Tactical Range Bag: Amazon
  • GCI 20 Outdoor folding table: Amazon

Failed POTA activation at Wolf Creek State Park (US-1033)

It has been over six months since I’ve attempted a POTA activation. The weather has started warming up a bit and I was well overdue to try another POTA activation. On April 6, 2024, the wife and I visited Wolf Creek State Park (US-1033) near Shelbyville, IL. On our way to the park, we stopped for lunch at the Broomtown Cafe in Arcola, IL. Sadly we arrived too late for breakfast so we tried the grilled cheese sandwich. I got mine with bacon which was pretty good.

We continued on our journey and arrived at the park around 3pm. I drove around looking for a decent spot to setup and eventually parked near the area marked overlook. There was no one there when we got there, so we setup amongst the trees with a nice view of the lake. It was in the 50s and sunny, but a darn wind off the lake was keeping us chilled. I had a sweater on but didn’t want to go back to the car to get my coat. The wife was smart and had a nice blanket to keep her fairly warm.

I setup the OM0ET MC-20 magnetic loop antenna and connected it to the Icom 705. My first thought was to try to work some FT8 to hopefully get the park activated. Well that went nowhere fast. I used my iPhone’s hotspot to create a mini network between the 705 and my iPad. The 705 connected just fine but my iPad was having nothing to do with my phone.

I then decided to try the access point mode on the 705 and connect the iPad directly to it. That worked for a few seconds and then either the iPad or the SDR Control software disconnected leaving me out of luck on the digital modes. I’ve never had much luck connecting directly and this time was no different. I don’t know why I didn’t bring my laptop but I digress.

My next idea was to find a spot on 10 meter SSB and call CQ. I found an empty frequency on 28.475 and started calling CQ POTA. I spotted myself on the POTA website but never heard anyone come back to me. No worries, there were several QSO parties going on the bands so I tried my hand at those. I managed to work two folks in the Mississippi QSO party and one in the Louisiana QSO party on 20m. I switched to 17m and worked CT9/UR9IDX in Portugal which was pretty cool. I was only running 5 watts off the Icom 705 battery pack.

Sadly it was getting closer to sunset and the cool wind was a bit too much discomfort for us so I had to cut the activation short before getting my ten contacts. I packed up the ham gear along with our tables and chairs and headed back to the car. We then made our way back to Champaign as darkness fell.

After I thought about the connection issues more, I remembered we had switched cell phone providers since the last POTA activation. I discovered the new carrier only allows one device to be connected to the hotspot at a time. That explains why I was unable to connect both the iPad and the 705 to my phone. I probably should get a portable router that both devices can connect to when I’m out and about. Or just bring a laptop and connect via USB which would probably be the easier and cheapest option. Despite the chilly weather and failed activation, it was nice to get spend a few hours playing radio outside.

Log

DateTime (UTC)CallsignBandModeNotesAudio
2024-04-0621:30K5M20MSSBLouisiana QSO Party
2024-04-0621:32W5SGL20MSSBMississippi QSO Party
2024-04-0622:12CT9/UR9IDX17MSSBMadeira Island
2024-04-0622:21W5NO20MSSBMississippi QSO Party

Gear

Here is the list of gear I used for this outing. Some of these links are affiliate links that support my website and content creation.

  • Icom IC-705 QRP HF/VHF/UHF portable radio: DXE | GigaParts | HRO | MTC | R&L
  • OM0ET MC-20 Magnetic Loop Antenna: OM0ET Website
  • Insignia 6-ft light stand (NS-DLS75SBK): Amazon
  • JJC Deluxe Lens Case Pouch for Icom 705 (XXL size): Amazon
  • SHANGRI-LA Tactical Range Bag: Amazon
  • GCI 20 Outdoor folding table: Amazon