Gaia GPS and ham radio

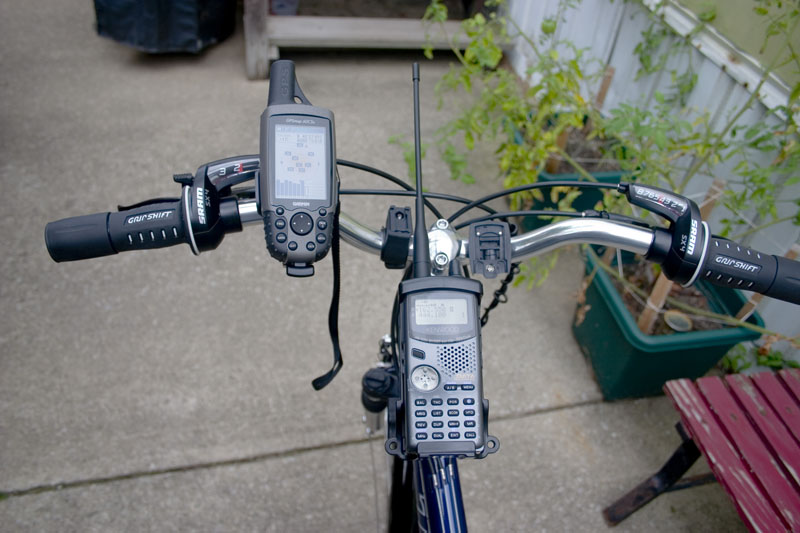
I use the Gaia GPS app on my iPhone for finding and recording various hiking trails around me. I discovered you could import GPX, KML and other files into Gaia GPS. I thought it would be cool if I could add some ham radio items right into Gaia GPS. After some research, I was able to import GPX files from Repeater Book, POTA and SOTA websites.

Repeater Book

  • Go to the RepeaterBook.com website
  • Log in if you haven’t already and click on North American Repeaters.
  • Click on the state you are interested in. I chose Illinois since that is where I am.
  • Choose whichever criteria you want. I chose All for simplicity.
  • You should see a list of repeaters. Click on Export at the top and choose GPX.
  • Click OK on the warning screen.
  • It will ask you to choose what two labels you want. I picked the Callsign for #1 and Location (City) for #2.
  • Check the box that says “I agree to use this data for personal use only.” and then click Download.
  • In your downloads folder, you should now have a GPX file called repeaterbook_repeaters_datetime.

Parks on the Air (POTA)

  • Go to the POTA website and make sure you are logged in.
  • Click on the menu in the top left and choose Park List.
  • Scroll down to the United States and click the triangle on the left side to expand the list.
  • You should see a second listing for United States that shows all the individual states.
  • Click on the state you want.
  • With the list of parks listed, click on the Download link and choose GPX.
  • In your downloads folder, you should now have a GPX file called State(US-State). Mine says Illinois (US-IL).GPX

Summits on the Air (SOTA)

  • Go to the SOTA Maps website and make sure you are logged in.
  • Under Association at the top, choose the area you want to import. I chose W9 – USA since that is where I am located.
  • Under Region at the top, pick the one you are interested in. If you want all of the regions in that group, check the Multi box above the dropdown box. I picked W9/IL, W9/IN, W9/WI.
  • At the bottom of the list of summits, click the export button.
  • As before, choose the association and regions you want.
  • In the output format dropdown, choose GPX file and then click Create File.
  • In your downloads folder, you should now have a ZIP file called SMP_Date_Time.zip. You’ll need to extract the GPX file from the ZIP file before importing it to Gaia GPS.

Importing to Gaia GPS

Now that we have GPX files from each site, we can import them to Gaia GPS.

  • Go to the Gaia GPS website and make sure you are logged in.
  • On the menu on the left side of the screen, click on Import Data.
  • Click on select files and select the GPX file we downloaded from Repeater Book.
  • Check the Waypoints box and click on Import.
  • You should now see a list of repeaters that were in the GPX file. Click the Save Items button at the bottom. This will take a few moments depending on how many repeaters you exported.
  • When it’s done, you should see a list of your repeaters on the map.
  • Repeat these steps to import the GPX files from POTA and SOTA

Changing the icons

I like to change the icons to make them represent each group whether it’s a tower for a repeater or a tree for a park.

  • Click the Saved Items on the left menu.
  • Click on one of the imported files.
  • Click on Items.
  • Click the circle to the right of the first item. Then click the circle above it to select all the items.
  • Click the 3 dots next to the circle and select Set Icon.
  • For the repeaters, I used the tower icon. Type in tower and click the icon and click Save.
  • Depending on how many repeaters or other items you imported, it could take a while to change all the icons. When I did it, I had to repeat this process numerous times until all the icons changed to the new icons.

Now if you go to your phone and login to the Gaia GPS app, you should see the the imported items on your map. Pretty cool isn’t it? You can shut layers off and on as needed so they don’t clutter your phone or slow it down.

Let me know if you have any questions about this process or if you have other suggestions on what to import into Gaia GPS.

You can download Gaia GPS for iPhone or Android below.

iPhone: https://apps.apple.com/us/app/gaia-gps/id1201979492
Android: https://play.google.com/store/apps/details?id=com.trailbehind.android.gaiagps.pro&hl=en

I also made a video on how to import data from Repeater Book, POTA and SOTA into Gaia GPS.

Icom 880H D-STAR radio GPS setup

Garmin GPS 18x PC
I’m slowly rebuilding my ham radio shack after getting rid of everything a few years ago. One of the things I missed the most was the trusty dual band rig in the car. I decided to sell my iPad to help fund the radio purchase. I couldn’t afford a brand new rig, so I looked at the ham classified sites to see what was available. I settled on the Icom 880H 2m/70cm mobile rig. One thing that intrigued me about this setup was the fact that it has D-STAR capability built into it. We have a growing D-STAR network here in Illinois so it seemed like a good idea to have a radio with D-STAR.

When I got the rig, I tried programming a few repeaters in manually just to see if I could do it. The analog frequencies weren’t too difficult, but D-STAR was a bit more difficult. I figured it would be a good idea to program it with the computer, so I ordered the OPC-1529R data cable. I know most folks prefer the RT Systems software, but I decided to try the free Icom programming software instead.

It’s a pretty basic program, but it gets the job done. The problem is there is no way to directly import frequencies from sites like RepeaterBook and RFinder. There is another free programming software called CHIRP that lets you import from these sites. However, getting it from CHIRP into the Icom software is very clunky.

I finally decided to go to the Illinois Repeater Association website and copy/paste the repeaters into a text file. I then opened it in a spreadsheet program called LibreOffice Calc (Microsoft Office works as well) which then lets me sort and filter by regions of the state. Now this still doesn’t let me import into the Icom software. I ended up putting the spreadsheet on one side of my screen and the Icom software on the other and manually typing in the repeaters that I wanted. It’s a time consuming process but at least I can put the frequencies where I want them in the radio.

I have the radio plugged into my Comet CA2X4SR dual band antenna mounted on the door with a Diamond K400 mount. I’ve had this antenna hooked up to other radios over the years and it works great with the 880H. Another nice thing is the radio has a weather alert that lets you know when bad weather is approaching. It also scans air frequencies which are fun to listen to once in a while.

One thing I’ve missed that my old Kenwood D700A had is the APRS functionality. There is a way to get your position on the Icom 880H to the APRS network, but you need to add a GPS to the radio. (most of the other D-STAR radios have GPS built in) I chose the Garmin GPS 18x PC for my setup. It’s a very basic GPS unit with a 12v cigarette plug and 9-pin serial port on it. You hook it up to the Icom 880H with a null modem adapter.

There’s a few things in the radio you need to change before the GPS will work. The first is the data speed which defaults to 9600 bps. You need to change it to 4800 bps for it to work with the GPS 18x unit. Go into the SET menu, then FUNC and then SPEED and change it to 4800. If everything is hooked up properly, you will see the GPS indicator in the top right start blinking indicating it sees your GPS. When it has acquired a good satellite lock, the indicator will stay on.

Another thing you need to change for it to work with APRS is the GPS-TX mode. It defaults to DVG, but needs to be on DVA. It’s in the GPS –> GPS-TX menu. Inside that menu you’ll also want to change your symbol (the icon that shows up on the APRS map), add a comment and enable the direction/speed (DT EXT –> CUR.SPD) if you want that to show up.

You can see my position on the APRS network:
http://aprs.fi/#!call=a%2FK9SWX

Please note that your position will only show up on APRS when you push the PTT button on the microphone. You can set it up to automatically send it every so often, but that is highly frowned upon. (especially if the repeater is linked to a reflector or another repeater.)

I’ve put together a little video about my Icom 880H. Check it out and let me know what you think!

Parts list

    • Note: Some of these links below are affiliate links which means if you purchase the item I will get a commission from the sale.

Please let me know if you have any questions about all of this. Thanks! 73..

Stan – K9SWX

Upgrading the bicycle with ham radio

Well due to inclement weather and faulty pedals, I haven’t been on the bike in a little while now. I took the bike into the shop on Wednesday and had them install fenders as well as replace the pedals. Now the funny part of this is that the guy who worked on my bike is a customer where I work. Due to computer problems, he was behind on his payment so I had shut his service off on Tuesday! So he recognized me when I brought the bike in and I thought ‘oh boy, my bike will be CRW_1514destroyed now!) 😉

I dropped it off on a shortened lunch hour and went back to work. After work, I went over and picked the bike up. The fenders look amazing, they’re black instead of the boring silver ones you see on most bikes. The pedals are all metal instead of those crappy ones with rubber grips that came with the bike. The only thing they charged me for was the fenders, installation and swapping of the pedals was free! The fun part was actually paying. I have this nifty Trek credit card I’m using so that I can ride my bike before it gets too cold, yet pay for it a little later down the road. Well apparently this is something new for the bike shop as it took probably 10 minutes to checkout. (I guess most folks pay with cash, check, or regular credit card??) Anywho, the guy who worked on my bike is in need of computer help so I may be working on his computer in my free time. So that will work out great! 🙂

The hard part was getting the bike in the car as I didn’t anticipate the fenders being on there. I had to be careful not to bend/break them when putting the bike back in the car. I managed to do ok, though I had to do a small adjustment on the front fender as it was rubbing against the tire. After I got that done, it was time to install the goodies that I’ve drooled over. 🙂 I purchased a nifty CRW_1517 Garmin GPS 60csx unit that will ensure that I don’t get lost and let me map out a route should I need to deviate from my normal trip to work. It came with a 64 meg card which was perfect for not only the entire county but the entire state of Illinois including Chicago!

I had considered using my PDA and my bluetooth GPS unit on the bike, but the battery life of the PDA is horrible compared to a standalone unit. I also purchased a dual band ham radio HT (Kenwood TH-D7A) for the bike because lets face it, Stan without some sort of radio on CRW_1515his vehicle is just boring! As with my car, this will allow me to utilize the APRS network and plot my position on the internet! (once I get the cable to hook up the radio to the GPS!) I will post more on this aspect later. I have ordered a better HT antenna for the radio to hopefully be enough to hit the digipeater, but eventually I will probably need to come up with a real external antenna mounted on the back of the bike. (people will think I’m a cop or security guard!)

So this morning I rode to work for the first time in several weeks and it was tough on the old body to get back into the groove. One of the main reasons of getting the GPS was to track not only my location, but to map the elevation between my house and work. There’s a great website called MotionBased that allows you to export your data from the GPS into their site and then they map out all sorts of graphs and data from your GPS log. I’m anxious to try this out and see just how much of an elevation rise/drop on the route I take. I will update this at a later date as well.