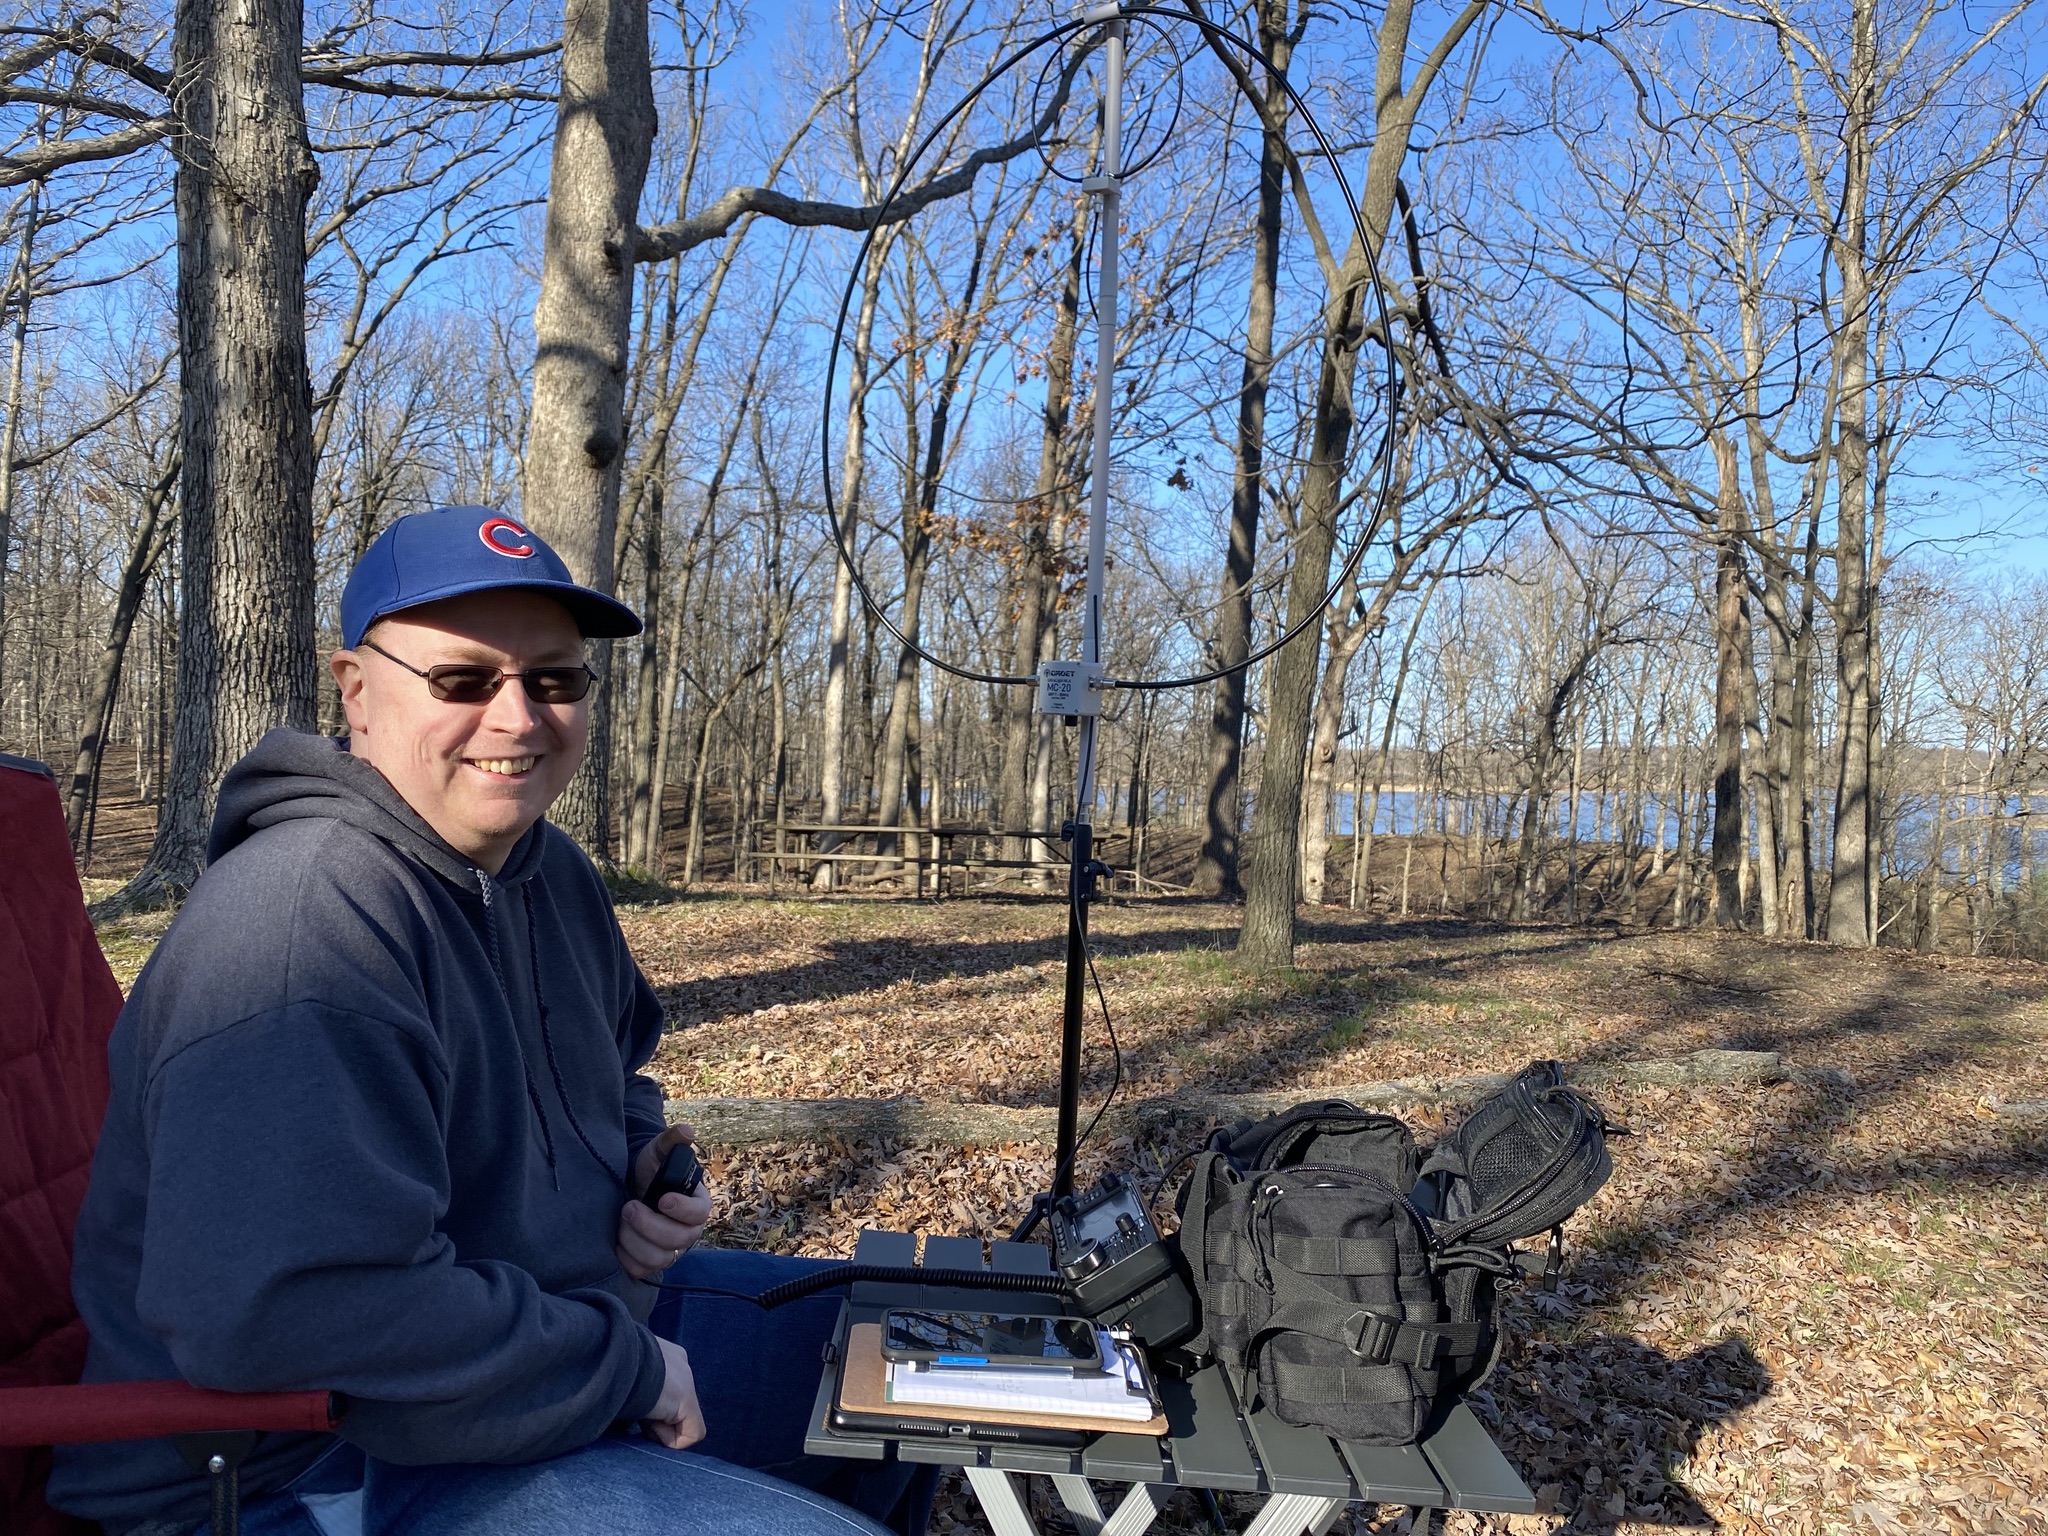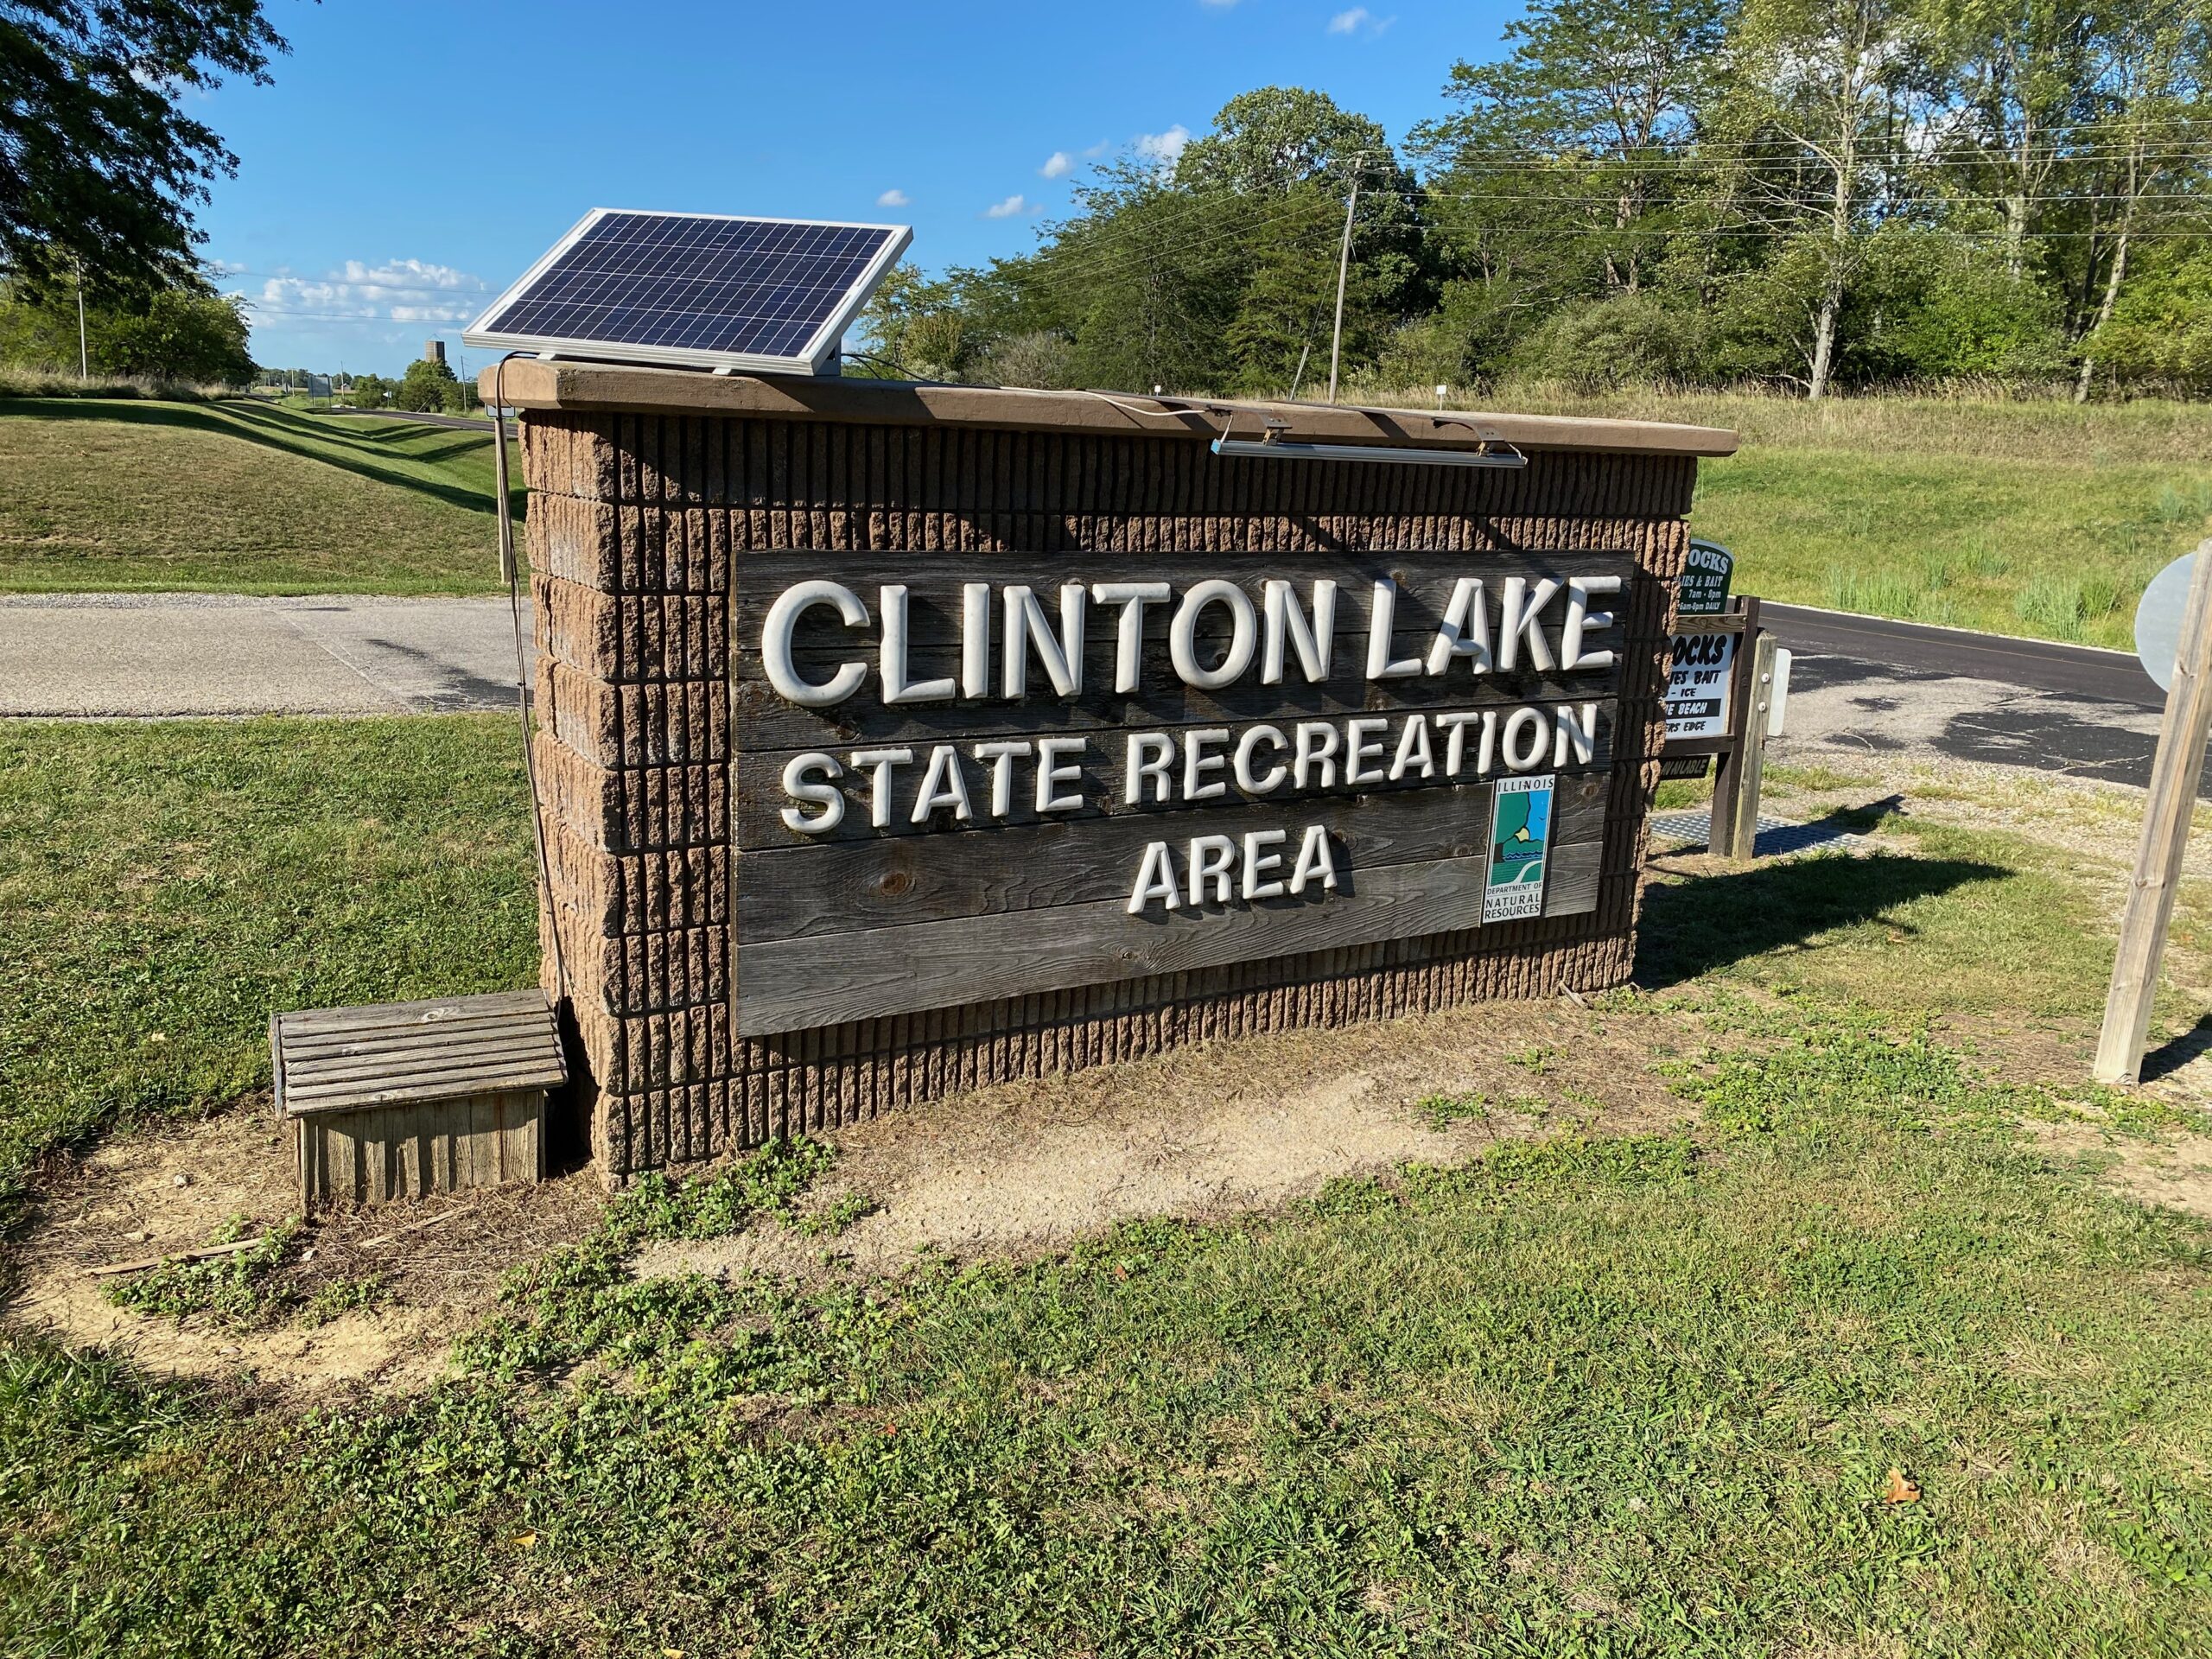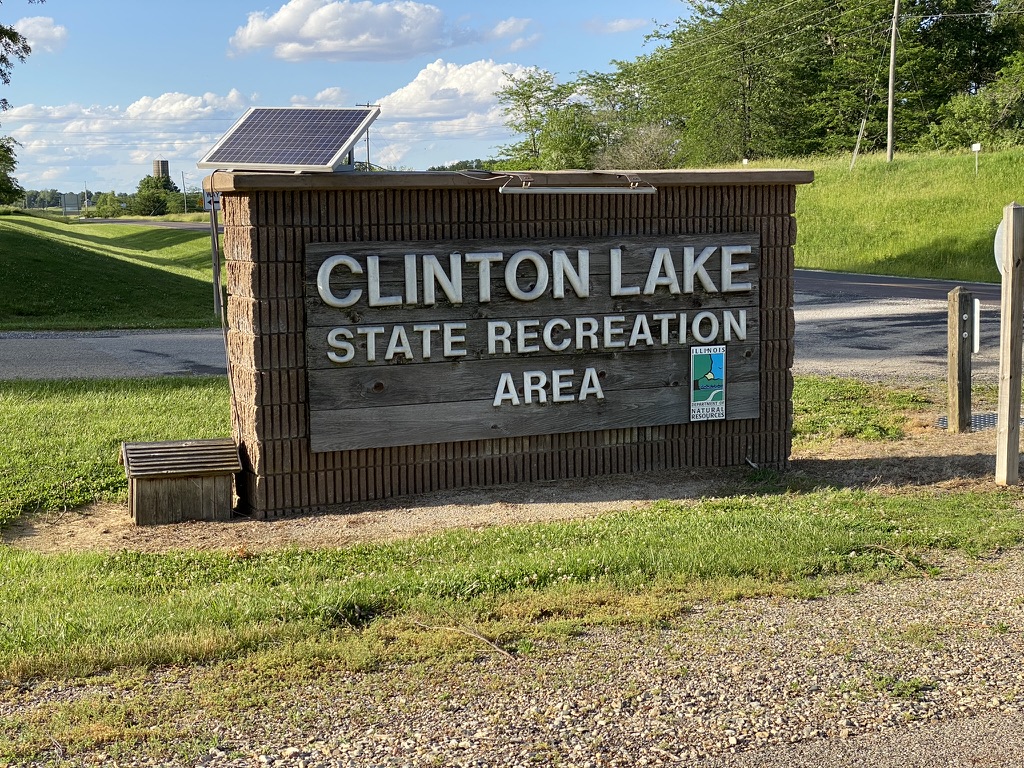
On Memorial Day (May 27, 2024), my wife and I visited Clinton Lake State Recreation Area (US-4093) for the afternoon. The lake and parking lots were packed with boaters and campers. We tried to find a spot with a view of the lake, but ended up settling on the exact spot we went to last September. The weather was 75 degrees with a nice breeze to keep most of the bugs away. Despite being close to the two emerging broods of cicadas, we didn’t see any on our visit.
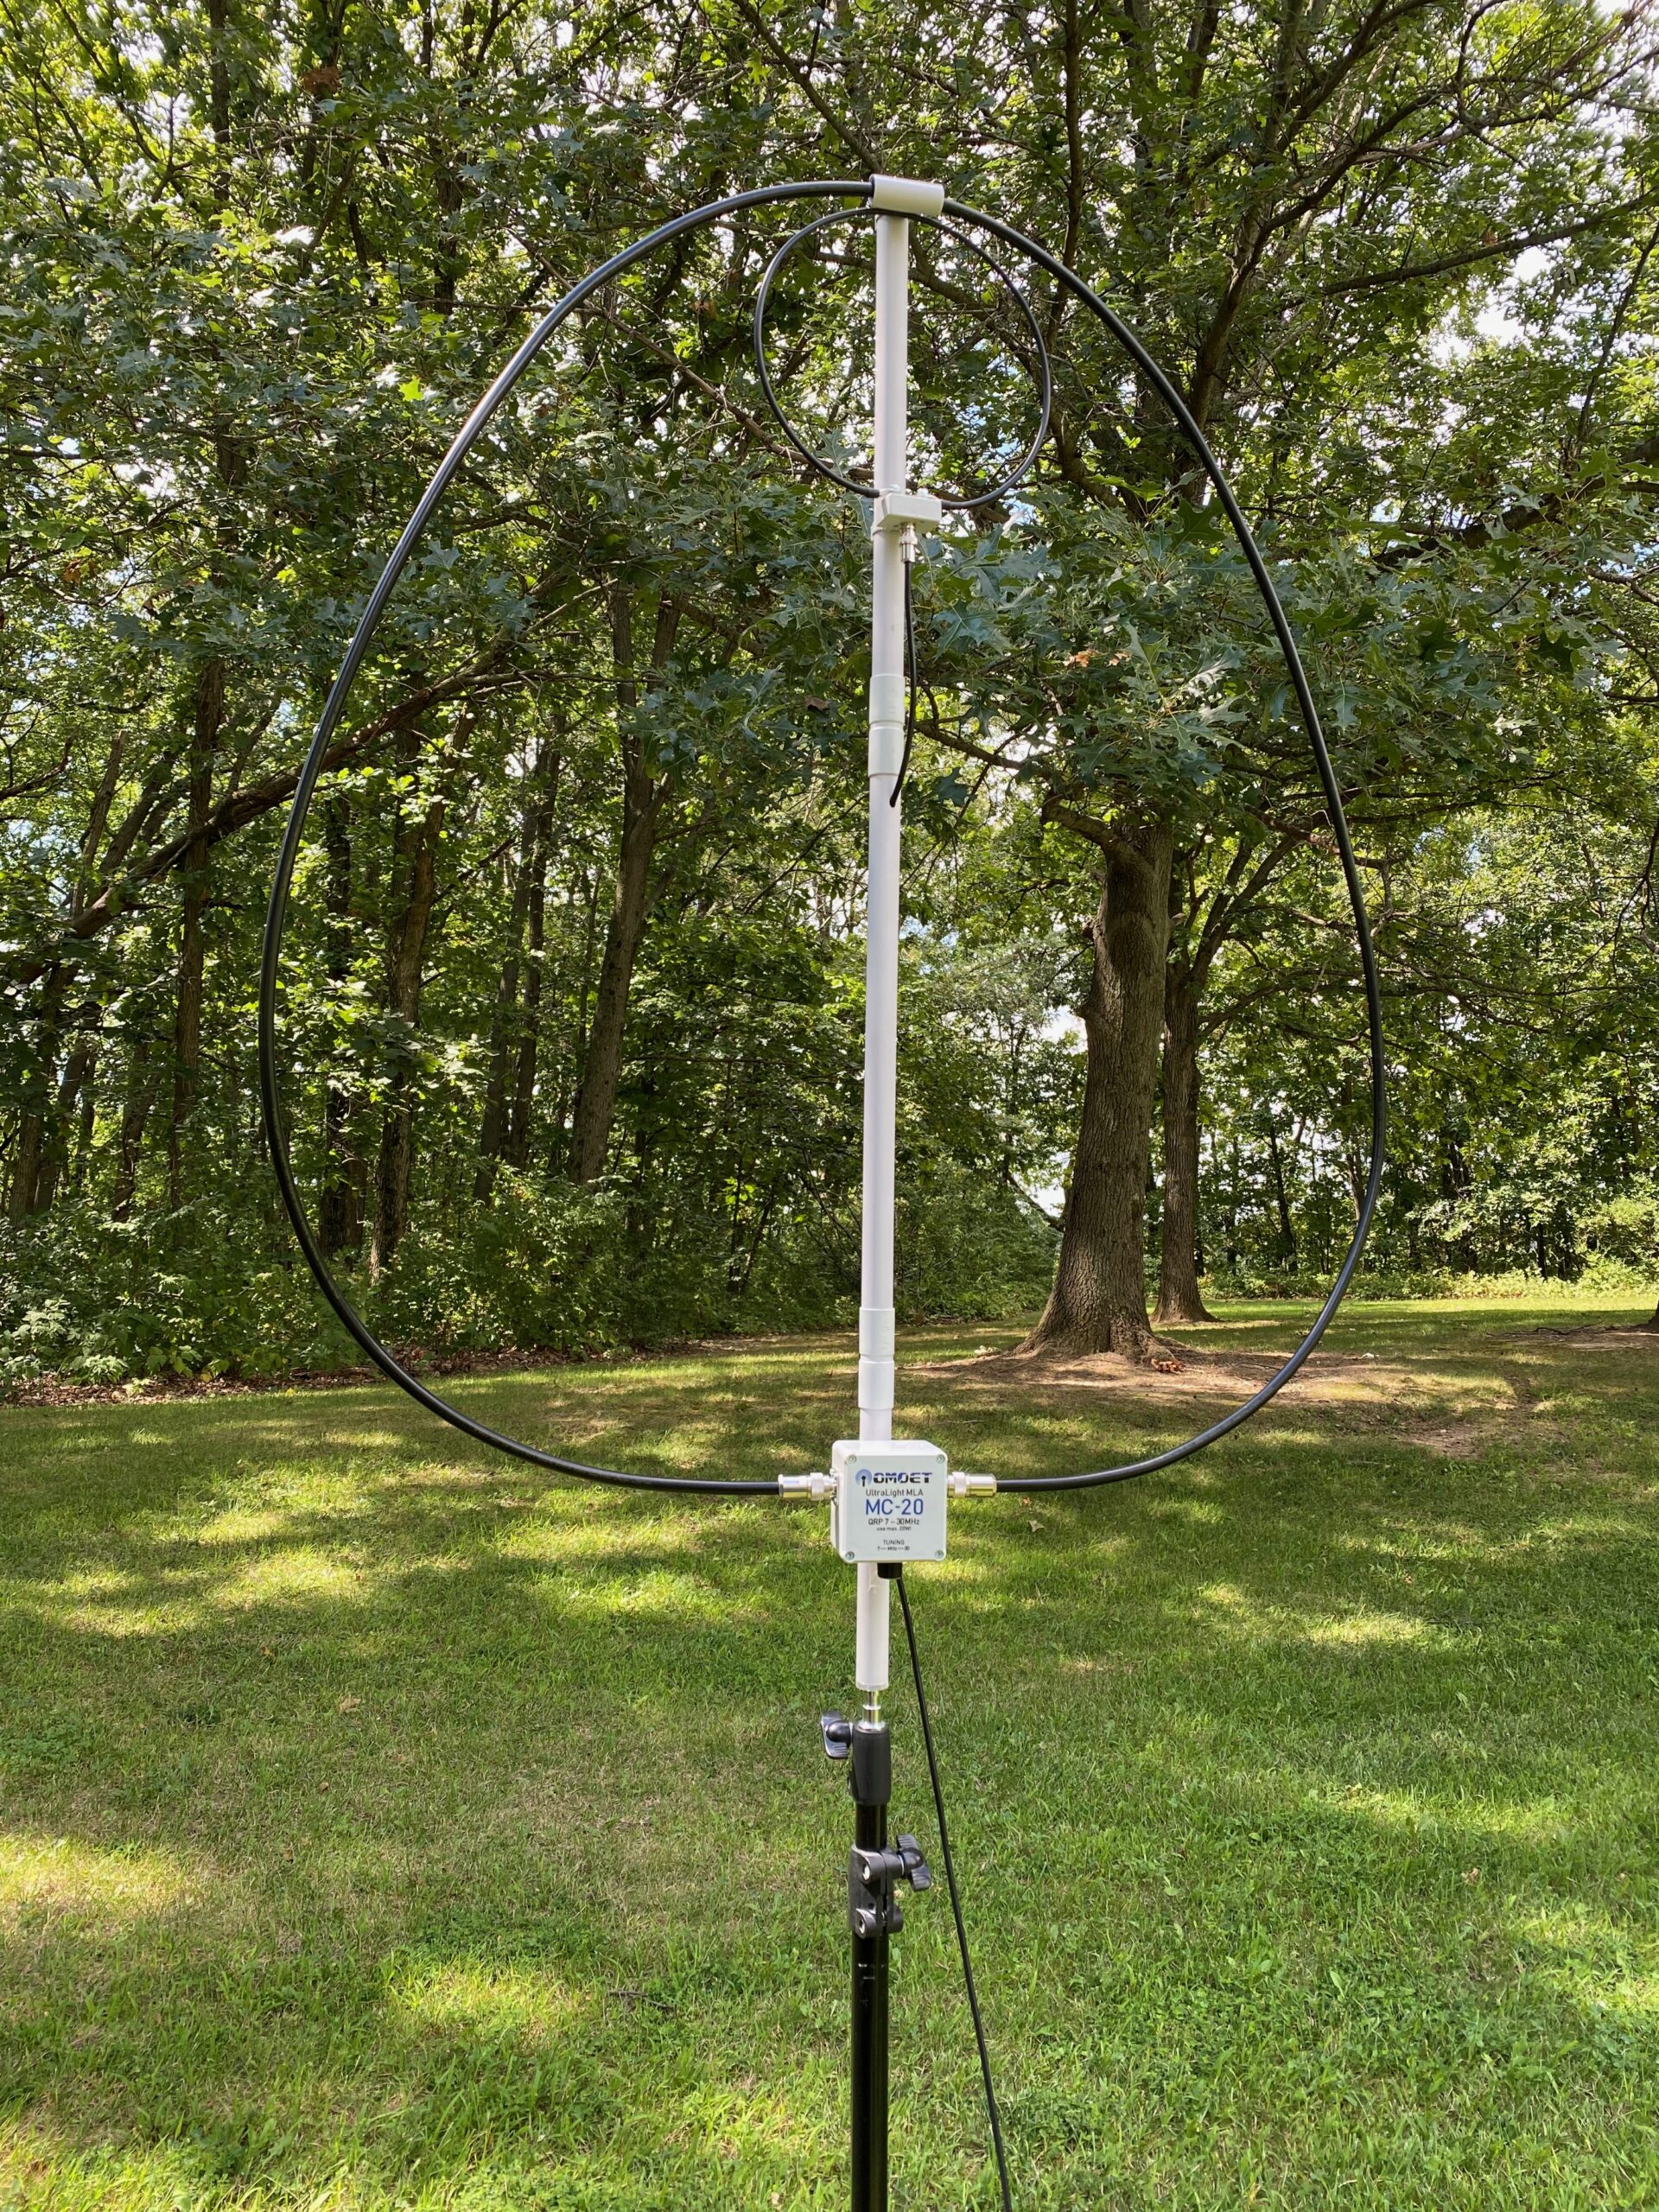
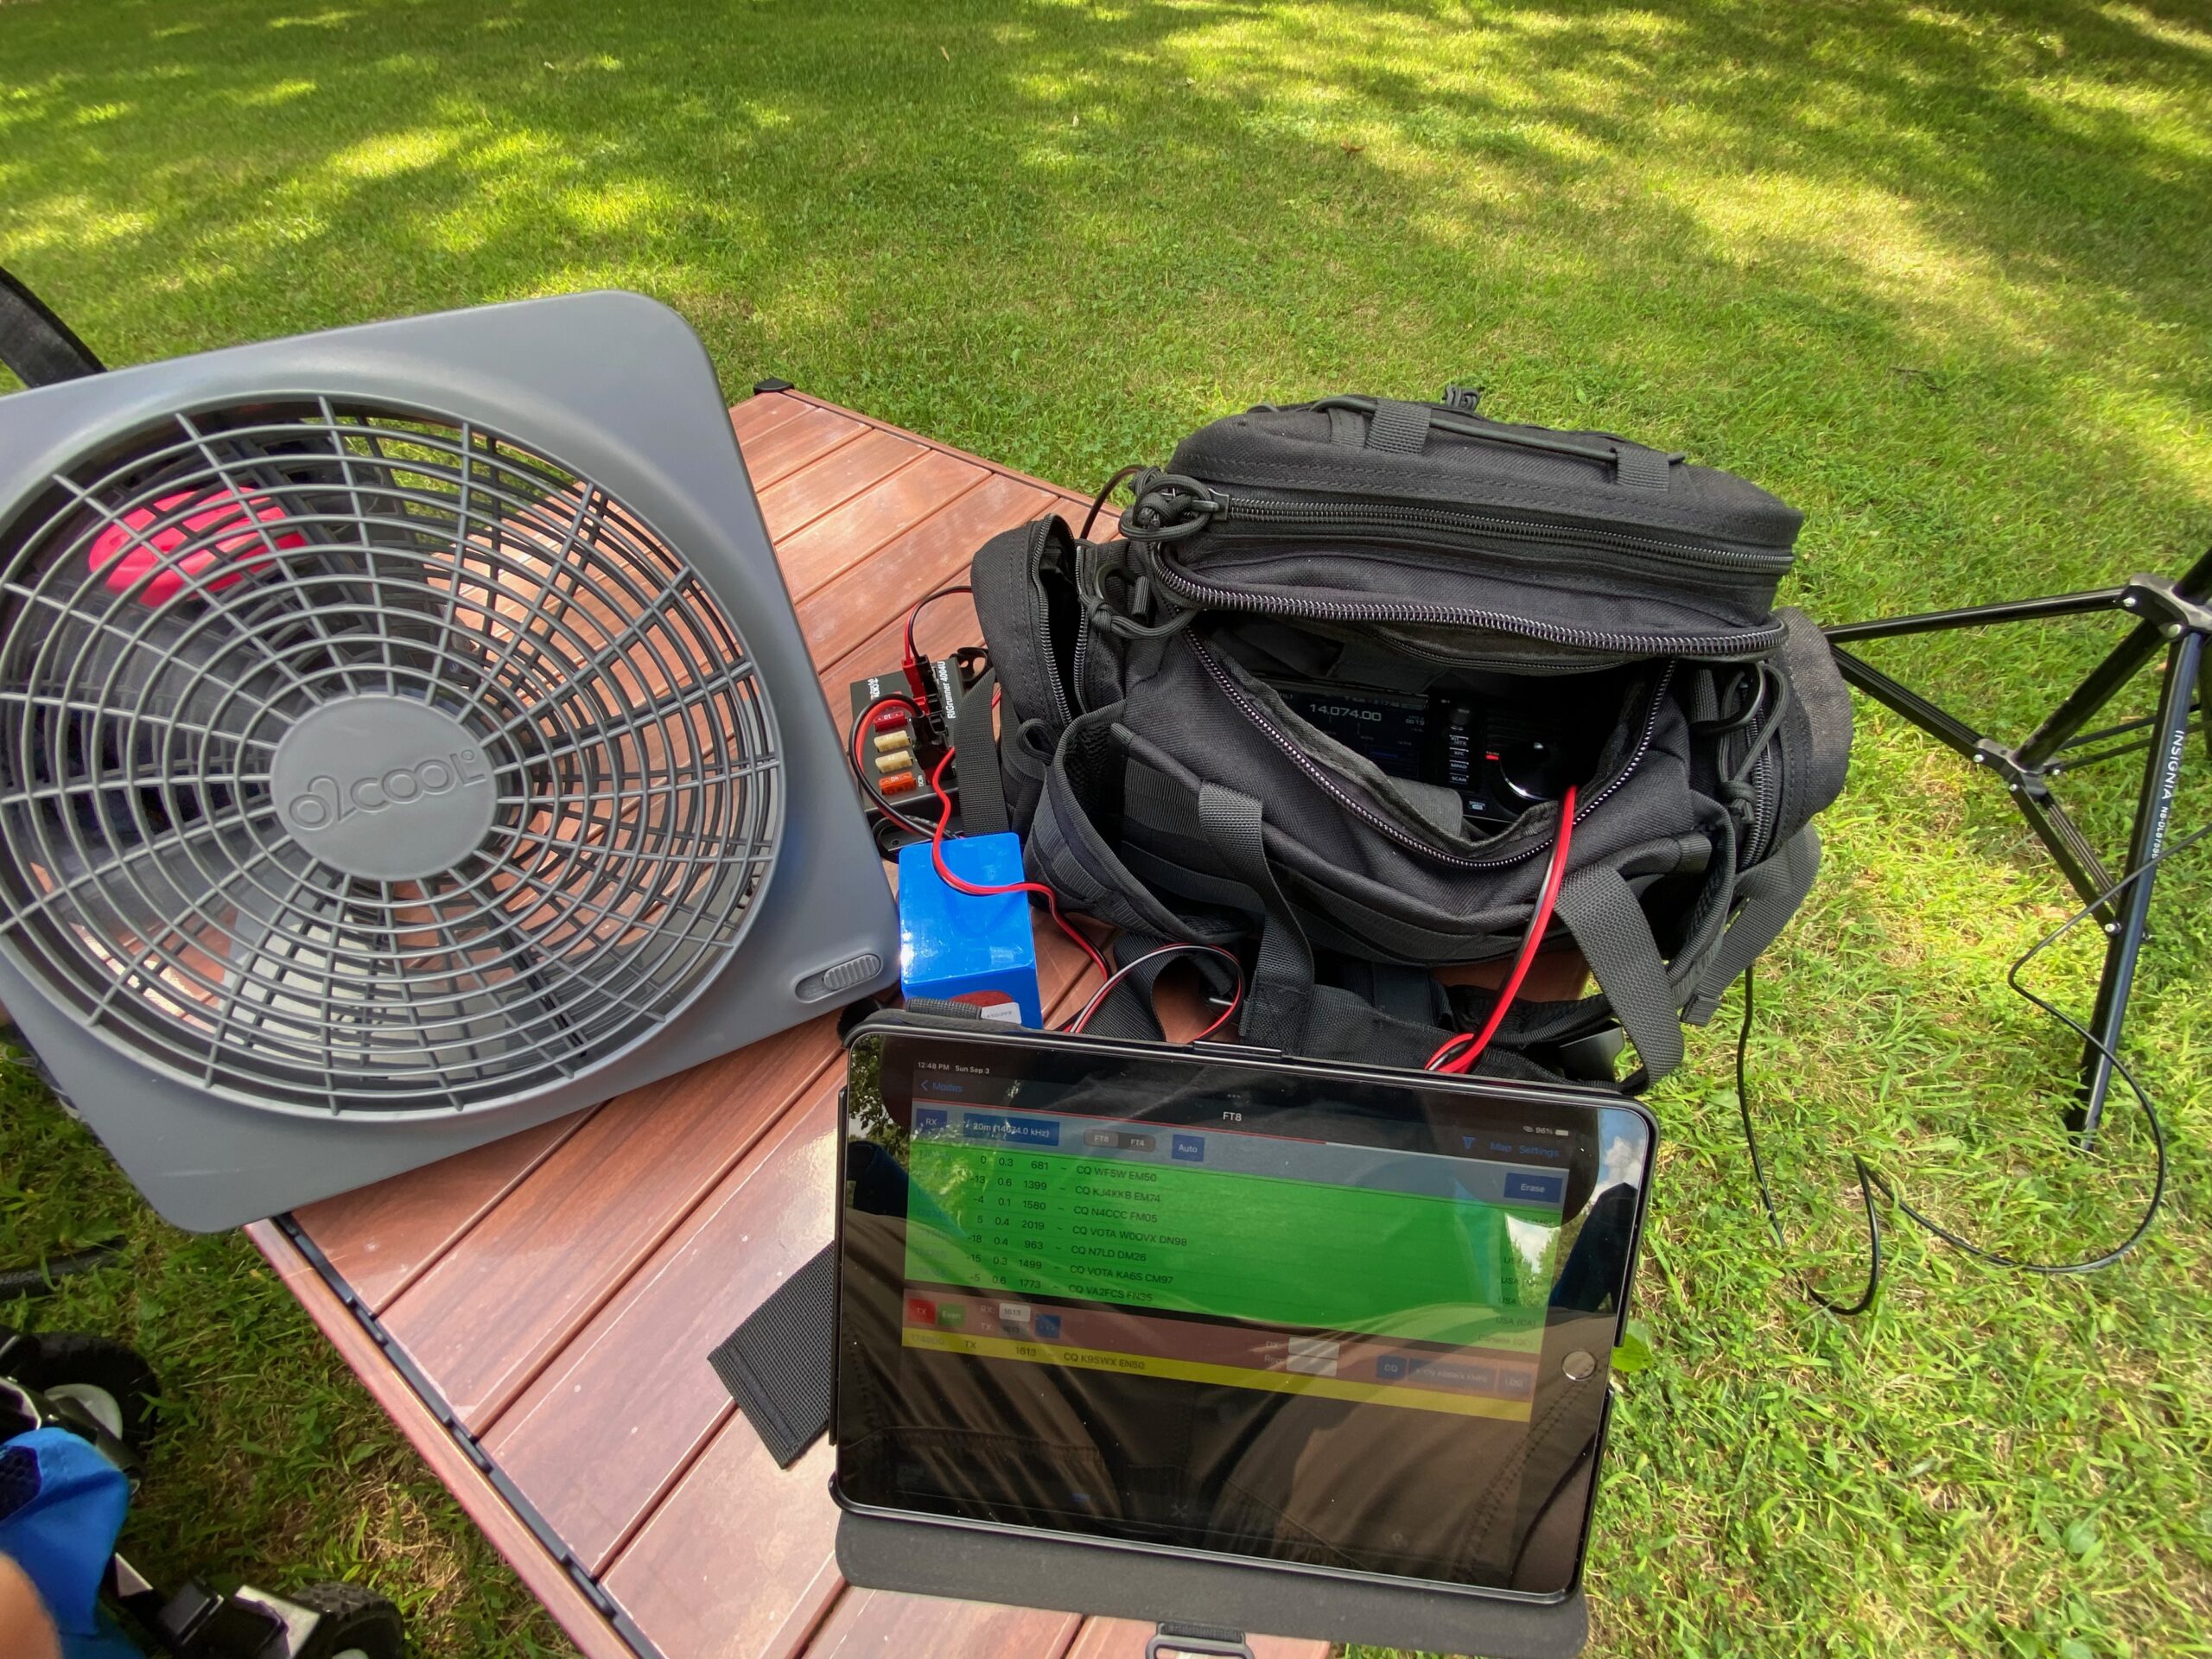
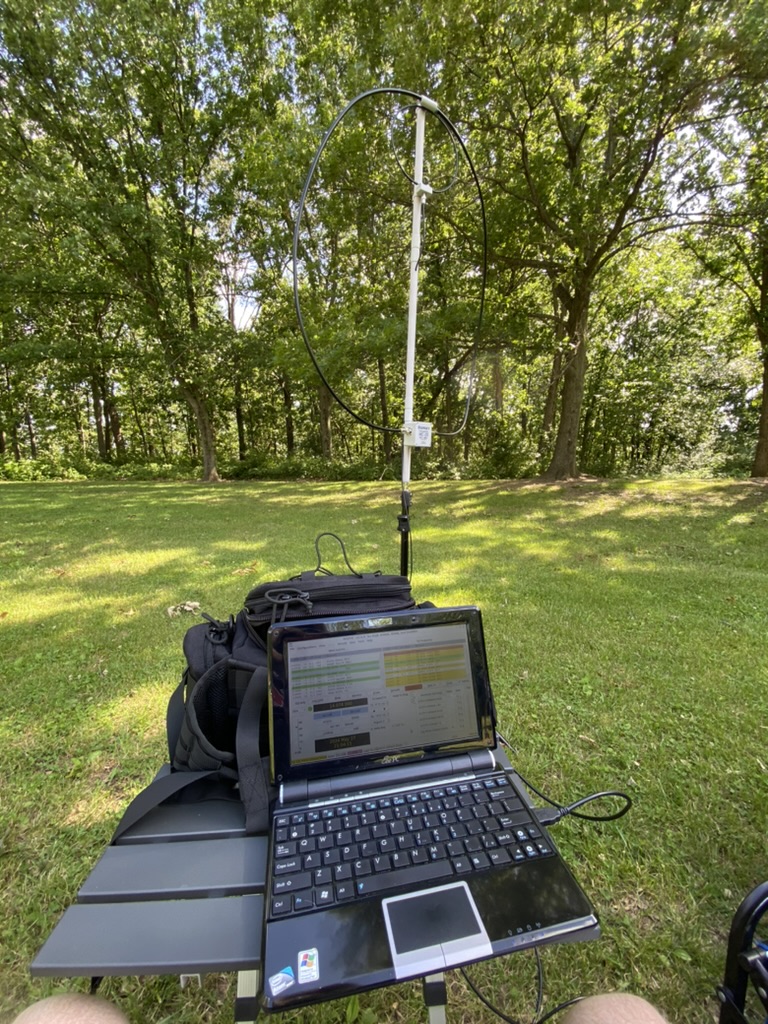
I setup my Icom 705 and the OM0ET MC-20 magnetic loop which is my go-to setup. While I do pack a 12v external LiFePO4 battery, I decided to just use the Icom 705 battery pack and run 5 watts. Instead of dealing with the previous problems with the iPad and connecting it to the 705, I brought a laptop with me. This is an old Asus EEE PC I bought in 2009! I recently revived it and I’m still astonished the battery holds a decent charge. It’s slow and only has 2 GB of RAM, but I was able to install a 32-bit version of Linux (Lubuntu 18.04) on it. It runs WSJT-X v2.40 and interfaces via USB cable with the Icom 705. The 10” screen is just big enough for WSJT-X though some of the settings are not visible in the menu.
Despite having a laptop, I still had some issues. One was it did not connect to my phone because I’m guessing the wireless card doesn’t like my iPhone for some reason. Even with the maximize compatibility option enabled, it would not connect. The second issue was the same as the last visit to this park and that was a pulsing noise coming from an electrical box down the way from where we were setup. Rotating the mag loop didn’t remove the noise.
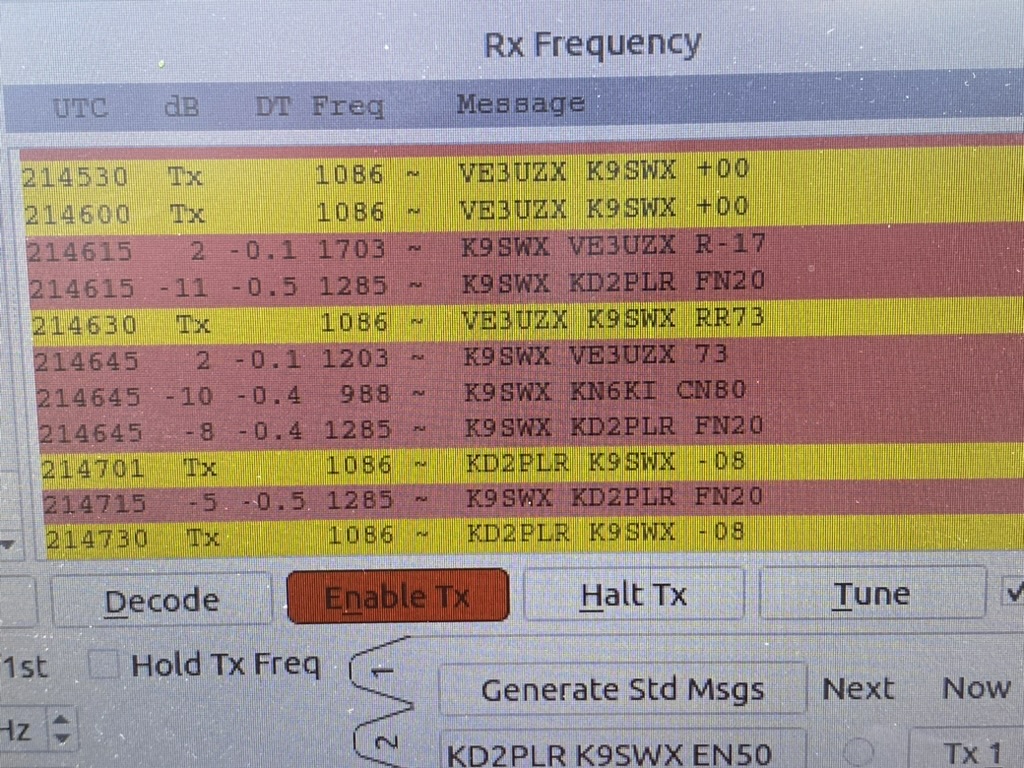
At first I thought the noise was preventing me from decoding any FT8, but I quickly realized that the time on the computer was off 3-4 seconds. Without the internet, I didn’t have an automated way to update the time. While the 705 has a GPS built-in, I didn’t have it configured yet on the computer. So I just pulled up the time on my phone and set it manually. As soon as I did that, the decoding started working. Whew!
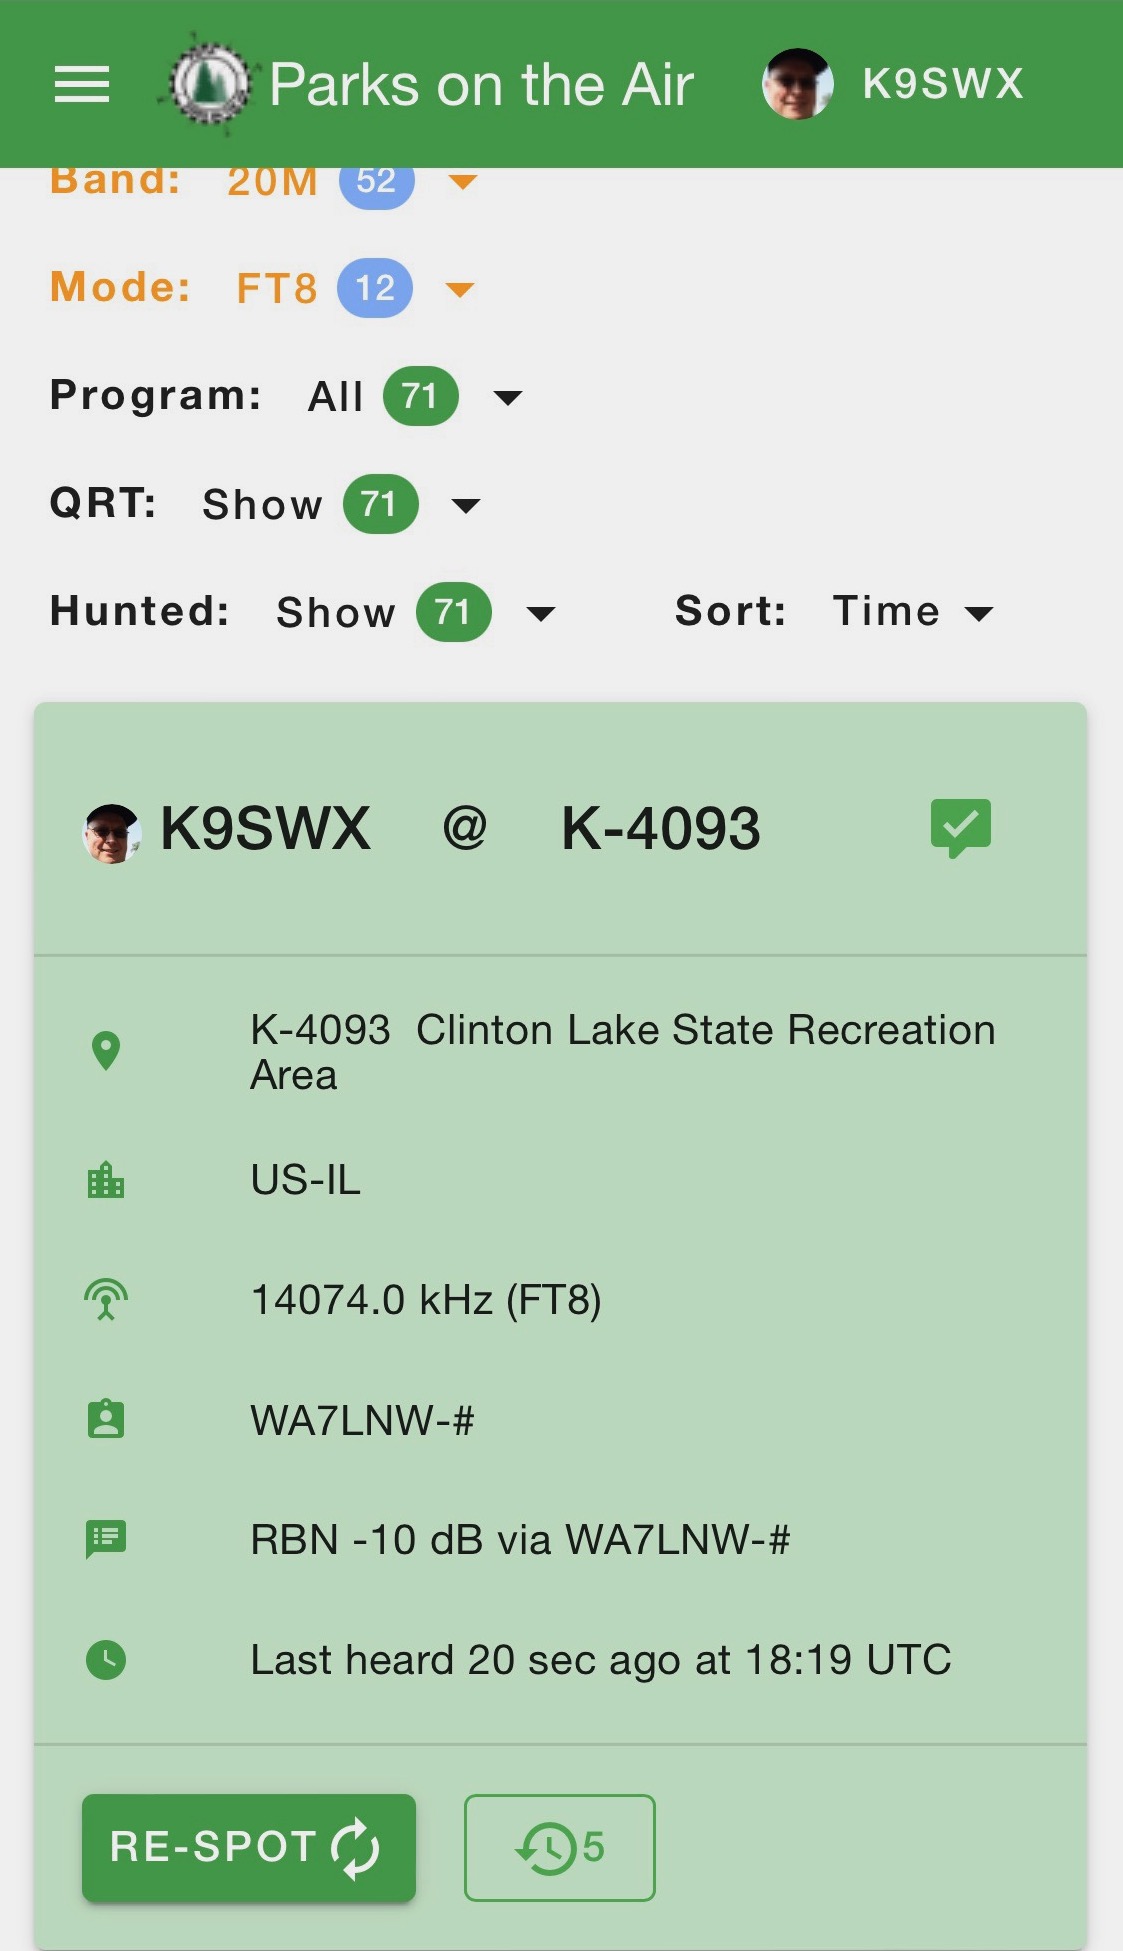
I hopped on the POTA website and spotted myself on 20m FT8. I started calling CQ and not too much later I received some replies. I checked PSK Reporter and my signal was being heard around the US. I tried switching to 15m but never made any contacts so I went back to 20m and made a few more before shutting down. I finished with 17 contacts in about an hour and a half. Not bad for 5 watts and a mag loop antenna!
It was nice not having any connection issues with the laptop and 705 using the USB cable. It was also nice to be able to call CQ POTA which I think helped people find me. I enjoyed putting the old laptop back into service. It still had around 50% battery left after an hour and a half which is amazing for the age of the battery. I think once I get the GPS from the 705 interfaced with the laptop that will eliminate the need to set the time manually. I may also try tethering my phone to the laptop via USB and see if I can get internet that way. It’s not completely needed but would be nice to have.
Log
| Date | Time (UTC) | Callsign | Band | Mode | Notes |
| 5/27/2024 | 20:53 | KA3E | 20M | FT8 | |
| 5/27/2024 | 20:56 | KB3IAI | 20M | FT8 | |
| 5/27/2024 | 21:00 | K7ZYV | 20M | FT8 | |
| 5/27/2024 | 21:08 | AG5PC | 20M | FT8 | |
| 5/27/2024 | 21:18 | N3ADO | 20M | FT8 | |
| 5/27/2024 | 21:21 | KI4MNR | 20M | FT8 | |
| 5/27/2024 | 21:28 | K2WLD | 20M | FT8 | |
| 5/27/2024 | 21:33 | NY4FD | 20M | FT8 | |
| 5/27/2024 | 21:39 | K4RNY | 20M | FT8 | |
| 5/27/2024 | 21:41 | KG2CV | 20M | FT8 | |
| 5/27/2024 | 21:45 | VE3UZX | 20M | FT8 | |
| 5/27/2024 | 21:47 | KF0PXO | 20M | FT8 | |
| 5/27/2024 | 22:08 | KC3ASJ | 20M | FT8 | |
| 5/27/2024 | 22:21 | WA2WL | 20M | FT8 | |
| 5/27/2024 | 22:25 | KD2MDS | 20M | FT8 | |
| 5/27/2024 | 22:27 | W2JC | 20M | FT8 | |
| 5/27/2024 | 22:29 | KC2HFQ | 20M | FT8 |
Gear
Here is the list of gear I used for this outing. Some of these links are affiliate links that support my website and content creation at no additional cost to you.
- Icom IC-705 QRP HF/VHF/UHF portable radio: DXE | GigaParts | HRO | MTC | R&L
- OM0ET MC-20 Magnetic Loop Antenna: OM0ET Website
- Insignia 6-ft light stand (NS-DLS75SBK): Amazon
- JJC Deluxe Lens Case Pouch for Icom 705 (XXL size): Amazon
- SHANGRI-LA Tactical Range Bag: Amazon
- GCI 20 Outdoor folding table: Amazon